Установите Postfix, Dovecot, MySQL
В этой главе нам необходимо установить Python 2.7, но он конфликтует с пакетом шаблонов-OpenSUSE-minimal_base. Поэтому мы должны в первую очередь удалить этот пакет. Для этого запустите YaST:
|
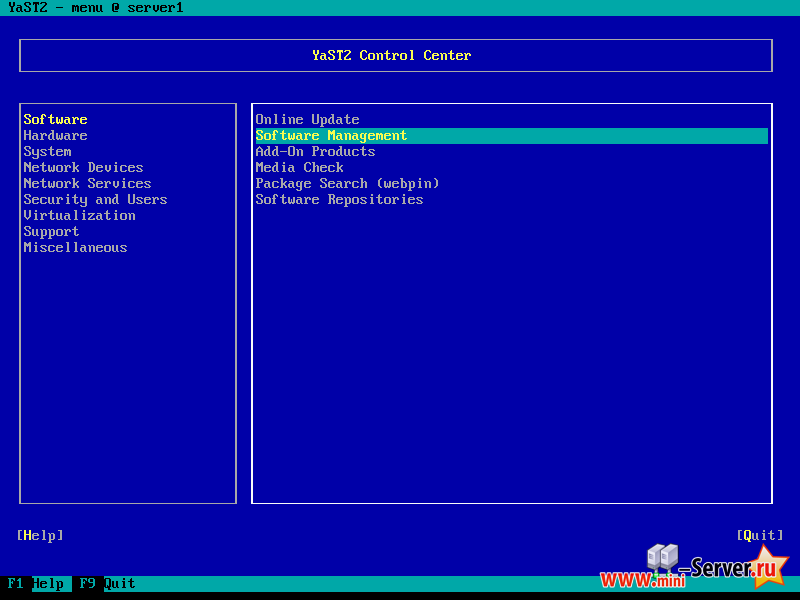
В YaST, перейти на Software - Software Management:

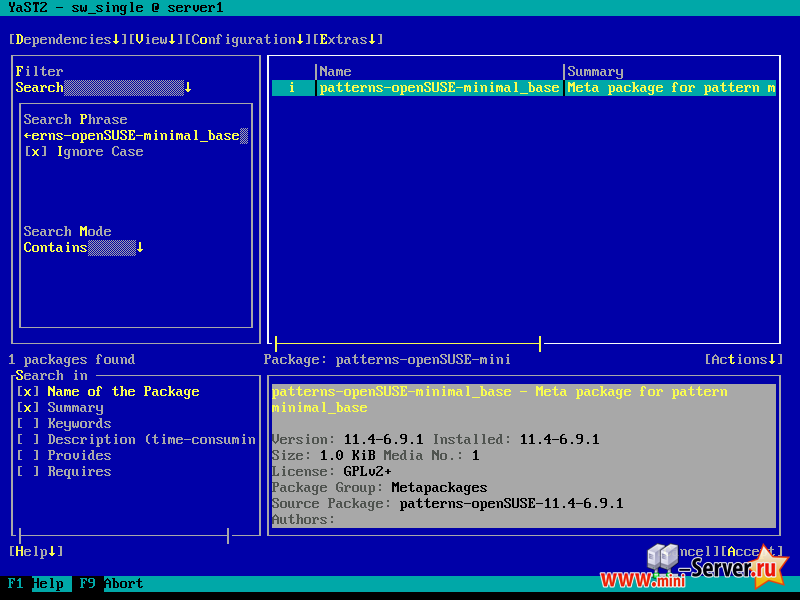
В поле поиск укажим patterns-openSUSE-minimal_base и нажмем ENTER. Пакет должны быть указаны в главном окне как установленый - ( i ). Нажимаем пробел или ENTER до тех пор пока маркер ( i ) не изменится на ( - ) (минус означает удаление), а затем нажмите [Accept] :

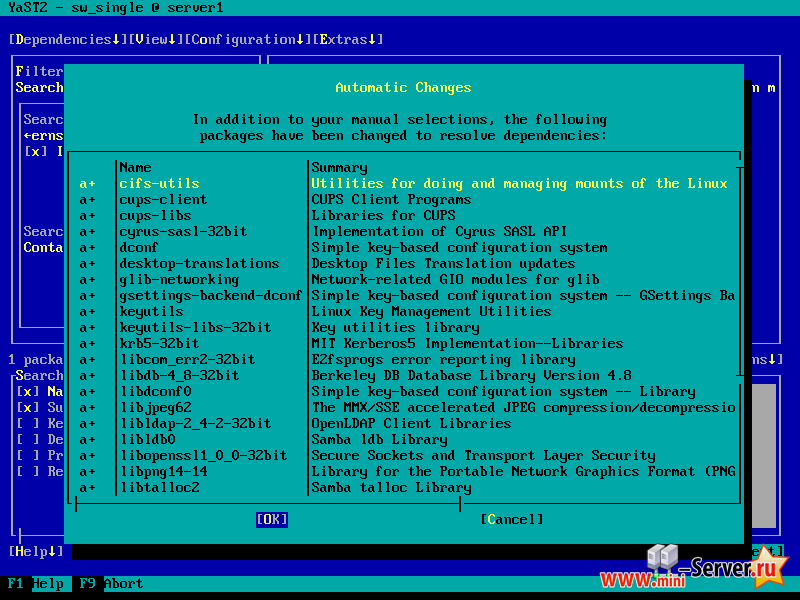
Как замена для пакетов, некоторые другие пакеты должны быть установлены. Принять выбор нажатием [OK] :

По окончанию выйдете из YaST.
Далее выполните:
|
Открыть /etc/postfix/master.cf ...
|
... и раскомментируйте следующую строку:
[...]
tlsmgr    unix  -       -       n       1000?   1       tlsmgr
[...]
Создайте следующую ссылку:
|
Запустите MySQL, Postfix, и Dovecot и активируйте сервисы при загрузки с системой.
|
Вы можете увидеть следующее предупреждение Dovecot которые можно игнорировать:
Starting dovecot Warning: There is no way to login to this server: disable_plaintext_auth=yes, ssl=no, no non-plaintext auth mechanisms.
If you have trouble with authentication failures,
enable auth_debug setting. See http://wiki.dovecot.org/WhyDoesItNotWork
This message goes away after the first successful login.
Теперь я могу установить пакет getmail rpm, которая не доступна из OpenSUSE основных репозиториев.
|
Для безопасной установки MySQL, выполните:
|
Теперь Вам будет предложено несколько вопросов:
server1:~ # mysql_secure_installation


NOTE: RUNNING ALL PARTS OF THIS SCRIPT IS RECOMMENDED FOR ALL MySQL
      SERVERS IN PRODUCTION USE!  PLEASE READ EACH STEP CAREFULLY!


In order to log into MySQL to secure it, we'll need the current
password for the root user.  If you've just installed MySQL, and
you haven't set the root password yet, the password will be blank,
so you should just press enter here.

Enter current password for root (enter for none): - ENTER
OK, successfully used password, moving on...

Setting the root password ensures that nobody can log into the MySQL
root user without the proper authorisation.

Set root password? [Y/n] - Y
New password: - Ваш root SQL пароль
Re-enter new password: - Ваш root SQL пароль
Password updated successfully!
Reloading privilege tables..
 ... Success!


By default, a MySQL installation has an anonymous user, allowing anyone
to log into MySQL without having to have a user account created for
them.  This is intended only for testing, and to make the installation
go a bit smoother.  You should remove them before moving into a
production environment.

Remove anonymous users? [Y/n] - Y
 ... Success!

Normally, root should only be allowed to connect from 'localhost'.  This
ensures that someone cannot guess at the root password from the network.

Disallow root login remotely? [Y/n] - Y
 ... Success!

By default, MySQL comes with a database named 'test' that anyone can
access.  This is also intended only for testing, and should be removed
before moving into a production environment.

Remove test database and access to it? [Y/n] - Y
 - Dropping test database...
 ... Success!
 - Removing privileges on test database...
 ... Success!

Reloading the privilege tables will ensure that all changes made so far
will take effect immediately.

Reload privilege tables now? [Y/n] - Y
 ... Success!

Cleaning up...


All done!  If you've completed all of the above steps, your MySQL
installation should now be secure.

Thanks for using MySQL!


server1:~ #
Теперь ваша установка MySQL должна быть завершена.
Amavisd-new, Spamassassin And Clamav
Установить Amavisd-new, Spamassassin And Clamav можно выполнив команду:
|
Откройте /etc/amavisd.conf ...
|
... и добавить ниже строку $myhostname соответствующую имени Вашему хосту:
[...]
$mydomain = 'example.com';   # a convenient default for other settings
$myhostname = "server1.$mydomain";
[...]
Затем создайте символическую ссылку с /var/run/clamav/clamd на /var/lib/clamav/clamd-socket :
|
Для запуска сервиса, выполните:
|


