 Nginx (произносится как "двигатель х") является свободным, открытым исходным кодом, высокопроизводительного HTTP-сервер. Nginx известен своей стабильностью, богатым набором функций, простой настройкой и низким потреблением ресурсов. В этом учебнике показано, как можно установить Nginx на CentOS 6.0 сервер с поддержкой PHP5 (через FastCGI) и MySQL поддержкой. На данный урок имеется виртуальный образ готового сервера, ознакомиться с которым подробней и скачать его можно на форуме Nginx в CentOS 6.0 + скачать.
Предварительные замечания
В данной статье я использую имя хоста server1.example.com с IP адресом 192.168.1.101. Эти параметры могут отличаться в Вашем случае, поэтому Вам придется заменить их в случае необходимости.
Включение дополнительных репозиториев
php-fpm не получится получить из официальных репозиториев CentOS, но с Remi RPM репозиториями, которая сама зависит от EPEL хранилищ, мы можем включить их следующим образом:
|
Изменим /etc/yum.repos.d/epel.repo ...
|
... и добавьте строку priority=10 в [epel] раздел:
[epel]
name=Extra Packages for Enterprise Linux 6 - $basearch
#baseurl=http://download.fedoraproject.org/pub/epel/6/$basearch
mirrorlist=https://mirrors.fedoraproject.org/metalink?repo=epel-6&arch=$basearch
failovermethod=priority
enabled=1
priority=10
gpgcheck=1
gpgkey=file:///etc/pki/rpm-gpg/RPM-GPG-KEY-EPEL-6
[...]
Затем то же самое для [remi] раздел в /etc/yum.repos.d/remi.repo, плюс измененим enabled на 1:
|
[remi]
name=Les RPM de remi pour Enterprise Linux $releasever - $basearch
#baseurl=http://rpms.famillecollet.com/enterprise/$releasever/remi/$basearch/
mirrorlist=http://rpms.famillecollet.com/enterprise/$releasever/remi/mirror
enabled=1
priority=10
gpgcheck=1
gpgkey=file:///etc/pki/rpm-gpg/RPM-GPG-KEY-remi
failovermethod=priority
[remi-test]
name=Les RPM de remi en test pour Enterprise Linux $releasever - $basearch
#baseurl=http://rpms.famillecollet.com/enterprise/$releasever/test/$basearch/
mirrorlist=http://rpms.famillecollet.com/enterprise/$releasever/test/mirror
enabled=0
gpgcheck=1
gpgkey=file:///etc/pki/rpm-gpg/RPM-GPG-KEY-remi
Установка MySQL 5
Сначала установите MySQL 5 следующим образом:
|
Затем мы создаем автозапуск для MySQL (так, что бы MySQL запускался автоматически при загрузке системы) и запустить сервер MySQL:
|
Теперь проверьте, что сеть включена. Выполним:
|
[root@server1 ~]# netstat -tap | grep mysql
tcp        0      0 *:mysql                     *:*                         LISTEN      2479/mysqld
[root@server1 ~]#
Если этого не произойдет, отредактируем /etc/my.cnf и закомментируйте опцию пропустить сетей:
|
[...]
#skip-networking
[...]
и перезапустить MySQL сервер:
|
Запустим:
|
Установим пароль для пользователя root (в противном случае любой желающий cможет получить доступ к MySQL базе данных!):
[root@server1 ~]# mysql_secure_installation
NOTE: RUNNING ALL PARTS OF THIS SCRIPT IS RECOMMENDED FOR ALL MySQL
      SERVERS IN PRODUCTION USE!  PLEASE READ EACH STEP CAREFULLY!
In order to log into MySQL to secure it, we'll need the current
password for the root user.  If you've just installed MySQL, and
you haven't set the root password yet, the password will be blank,
so you should just press enter here.
Enter current password for root (enter for none): - ENTER
OK, successfully used password, moving on...
Setting the root password ensures that nobody can log into the MySQL
root user without the proper authorisation.
Set root password? [Y/n] - ENTER
New password: - Ваш root SQL пароль
Re-enter new password: - Ваш root SQL пароль
Password updated successfully!
Reloading privilege tables..
 ... Success!
By default, a MySQL installation has an anonymous user, allowing anyone
to log into MySQL without having to have a user account created for
them.  This is intended only for testing, and to make the installation
go a bit smoother.  You should remove them before moving into a
production environment.
Remove anonymous users? [Y/n] - ENTER
 ... Success!
Normally, root should only be allowed to connect from 'localhost'.  This
ensures that someone cannot guess at the root password from the network.
Disallow root login remotely? [Y/n] - ENTER
 ... Success!
By default, MySQL comes with a database named 'test' that anyone can
access.  This is also intended only for testing, and should be removed
before moving into a production environment.
Remove test database and access to it? [Y/n] - ENTER
 - Dropping test database...
 ... Success!
 - Removing privileges on test database...
 ... Success!
Reloading the privilege tables will ensure that all changes made so far
will take effect immediately.
Reload privilege tables now? [Y/n] - ENTER
 ... Success!
Cleaning up...
All done!  If you've completed all of the above steps, your MySQL
installation should now be secure.
Thanks for using MySQL!
[root@server1 ~]#
Установка Nginx
Nginx доступен в виде пакета для CentOS 6.0 (от EPEL), который мы можем установить следующим образом:
|
Затем мы создаем автозапуск для Nginx и запустим его:
|
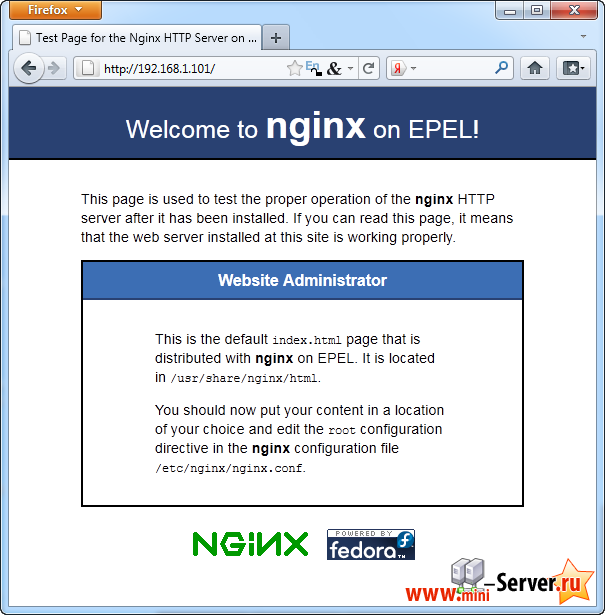
Введите IP-адрес вашего Web сервера или хоста в браузере (например, http://192.168.1.101 ), и Dы увидите пустую страницу (пустая, поскольку /usr/share/nginx/html/index.html пуст). Тем не менее Nginx работает, потому что мы видим пустую страницу):

Установка PHP5
Мы можем запустить в работу PHP5 в Nginx через PHP-FPM (является альтернативой PHP FastCGI реализации с некоторыми дополнительными возможностями полезна для сайтов любого размера, особенно загруженных. Мы можем установить PHP-FPM вместе с PHP-CLI PHP5 и некоторыми модулями, как PHP-MySQL которой вам необходим, если Вы хотите использовать MySQL из сценариев PHP следующим образом:
|
Затем откройте /etc/php.ini и добавьте строку cgi.fix_pathinfo=0:
|
[...]
; cgi.fix_pathinfo provides *real* PATH_INFO/PATH_TRANSLATED support for CGI.  PHP's
; previous behaviour was to set PATH_TRANSLATED to SCRIPT_FILENAME, and to not grok
; what PATH_INFO is.  For more information on PATH_INFO, see the cgi specs.  Setting
; this to 1 will cause PHP CGI to fix its paths to conform to the spec.  A setting
; of zero causes PHP to behave as before.  Default is 1.  You should fix your scripts
; to use SCRIPT_FILENAME rather than PATH_TRANSLATED.
; http://www.php.net/manual/en/ini.core.php#ini.cgi.fix-pathinfo
cgi.fix_pathinfo=0
[...]
В дополнение к этому, для того, чтобы избежать ошибок:
[08-Aug-2011 18:07:08] PHP Warning: phpinfo(): It is not safe to rely on the system's timezone settings. You are *required* to use the date.timezone setting or the date_default_timezone_set() function. In case you used any of those methods and you are still getting this warning, you most likely misspelled the timezone identifier. We selected 'Europe/Berlin' for 'CEST/2.0/DST' instead in /usr/share/nginx/html/info.php on line 2
... в /var/log/php-fpm/www-error.log при вызове PHP-скрипта в вашем браузере, Вы должны установить date.timezone в /etc/php.ini:
[...]
[Date]
; Defines the default timezone used by the date functions
; http://www.php.net/manual/en/datetime.configuration.php#ini.date.timezone
date.timezone = "Europe/Berlin"
[...]
Вы можете узнать правильный часовой пояс для вашей системы, выполнив:
— Регулярная проверка качества ссылок по более чем 100 показателям и ежедневный пересчет показателей качества проекта.
— Все известные форматы ссылок: арендные ссылки, вечные ссылки, публикации (упоминания, мнения, отзывы, статьи, пресс-релизы).
— SeoHammer покажет, где рост или падение, а также запросы, на которые нужно обратить внимание.
SeoHammer еще предоставляет технологию Буст, она ускоряет продвижение в десятки раз, а первые результаты появляются уже в течение первых 7 дней. Зарегистрироваться и Начать продвижение
|
[root@server1 nginx]# cat /etc/sysconfig/clock
ZONE="Europe/Berlin"
[root@server1 nginx]#
Затем создайте автозапуск для PHP-FPM и запустить его:
|
PHP-FPM является демоном (с сценарием инициализации /etc/init.d/php-fpm ), который запускает FastCGI сервер через порт 9000.
Настройка Nginx
Конфигурации Nginx в /etc/nginx/nginx.conf который мы открываем сейчас:
|
Конфигурация легко понять (Вы можете узнать больше об этом здесь: http://wiki.codemongers.com/NginxFullExample и здесь: http://wiki.codemongers.com/NginxFullExample2)
Первая (это не обязательно), вы можете увеличить количество рабочих процессов и установить keepalive_timeout до разумного значения:
[...]
worker_processes  5;
[...]
    keepalive_timeout  2;
[...]
Виртуальные хосты определяются server {} контейнерах. Давайте изменим умолчанию виртуальный хост следующим образом:
[...]
    server {
        listen       80;
        server_name  _;
        #charset koi8-r;
        #access_log  logs/host.access.log  main;
        location / {
            root   /usr/share/nginx/html;
            index  index.php index.html index.htm;
        }
        error_page  404              /404.html;
        location = /404.html {
            root   /usr/share/nginx/html;
        }
        # redirect server error pages to the static page /50x.html
        #
        error_page   500 502 503 504  /50x.html;
        location = /50x.html {
            root   /usr/share/nginx/html;
        }
        # proxy the PHP scripts to Apache listening on 127.0.0.1:80
        #
        #location ~ \.php$ {
        #    proxy_pass   http://127.0.0.1;
        #}
        # pass the PHP scripts to FastCGI server listening on 127.0.0.1:9000
        #
        location ~ \.php$ {
            root           /usr/share/nginx/html;
            fastcgi_pass   127.0.0.1:9000;
            fastcgi_index  index.php;
            fastcgi_param  SCRIPT_FILENAME  $document_root$fastcgi_script_name;
            include        fastcgi_params;
        }
        # deny access to .htaccess files, if Apache's document root
        # concurs with nginx's one
        #
        location ~ /\.ht {
            deny  all;
        }
    }
[...]
server_name _; делает этот виртуальный хост по умолчанию всеохватывающий (конечно, Вы можете также указать имя хоста здесь, как www.example.com ).
В location / части, я добавил index.php на index строки. root /usr/share/nginx/html, означает, что корневая директория файлов /usr/share/nginx/html.
Важной частью для PHP это location ~ \.php$ {} строфы. Уберите это, чтобы включить его. Изменение корневой строки dosument корень веб-сайта (например, root /usr/share/nginx/html; ). Пожалуйста, убедитесь, что Вы изменили fastcgi_param строки SCRIPT_FILENAME /usr/share/nginx/html$fastcgi_script_name; поскольку в противном случае PHP интерпретатор не найдет PHP скрипт, который Вы вызываете в Вашем браузере.
PHP-FPM прослушивает порт 9000 на 127.0.0.1 по умолчанию, поэтому мы указываем Nginx для подключения к 127.0.0.1:9000 в строке fastcgi_pass 127.0.0.1:9000;. Это также можно сделать PHP-FPM использовать сокет Unix - я опишу это далее.
Теперь сохраните файл и перезагрузите Nginx:
|
Теперь создайте следующий файл PHP в корневой документ /usr/share/nginx/html ...
|
<?php
phpinfo();
?>
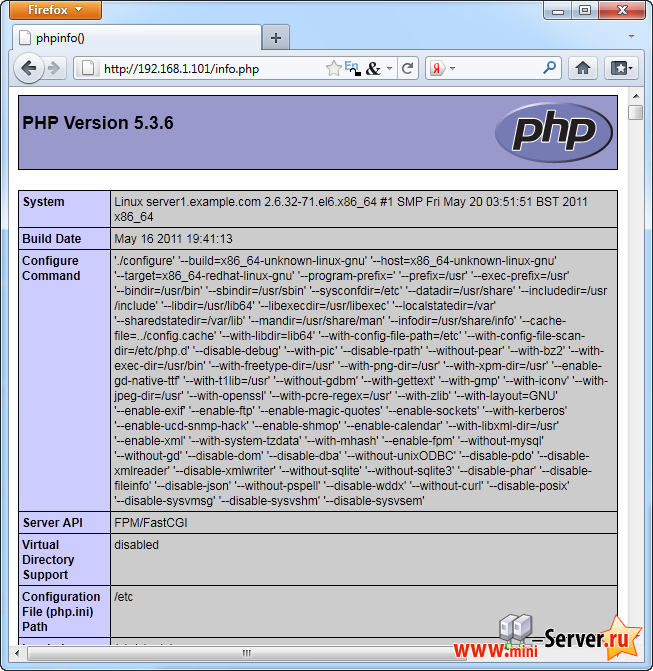
Теперь мы вызываем этот файл в браузере (например, http://192.168.1.101/info.php ):

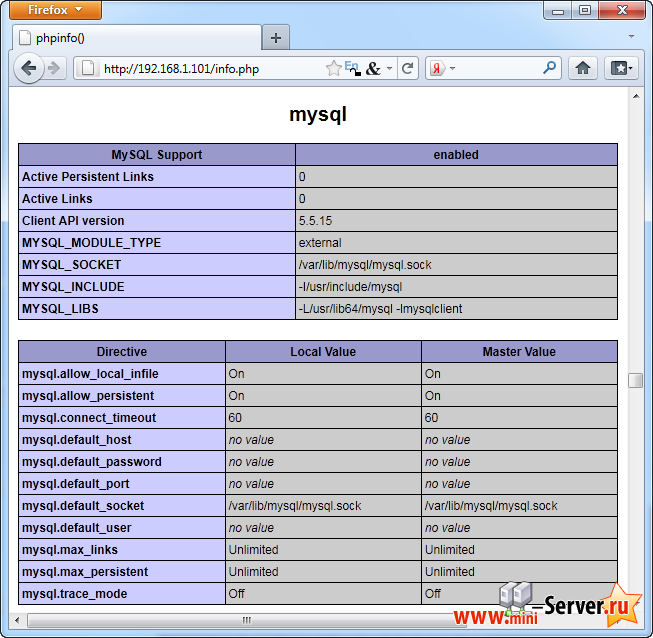
Как видите, PHP5 работает, и он работает через FPM/FastCGI, как показано в Server API строке. Если Вы прокрутите дальше вниз, Вы увидите все модули, которые уже включены в PHP5, включая модуль MySQL:

Создание PHP-FPM Использование сокета
По умолчанию PHP-FPM прослушивает порт 9000 на 127.0.0.1 . Это также можно сделать PHP-FPM используя сокет Unix, который позволяет избежать накладных расходов TCP. Чтобы сделать это, откройте /etc/php-fpm.d/www.conf ...
|
... и сделать строку listen, так что бы она выглядела следующим образом:
[...]
;listen = 127.0.0.1:9000
listen = /tmp/php5-fpm.sock
[...]
Затем перезагрузите PHP-FPM:
|
Далее откройте конфигурацию Nginx, и все ваши виртуальных доменов и измените строки fastcgi_pass 127.0.0.1:9000; на fastcgi_pass unix:/tmp/php5-fpm.sock; , например, так:
— Разгрузит мастера, специалиста или компанию;
— Позволит гибко управлять расписанием и загрузкой;
— Разошлет оповещения о новых услугах или акциях;
— Позволит принять оплату на карту/кошелек/счет;
— Позволит записываться на групповые и персональные посещения;
— Поможет получить от клиента отзывы о визите к вам;
— Включает в себя сервис чаевых.
Для новых пользователей первый месяц бесплатно. Зарегистрироваться в сервисе
|
[...]
        location ~ \.php$ {
            root           /usr/share/nginx/html;
            fastcgi_pass   unix:/tmp/php5-fpm.sock;
            fastcgi_index  index.php;
            fastcgi_param  SCRIPT_FILENAME  $document_root$fastcgi_script_name;
            include        fastcgi_params;
        }
[...]
Наконец перезапустите Nginx:
|
На данный урок имеется виртуальный образ готового сервера, ознакомиться с которым подробней и скачать его можно на форуме Nginx в CentOS 6.0 + скачать.

